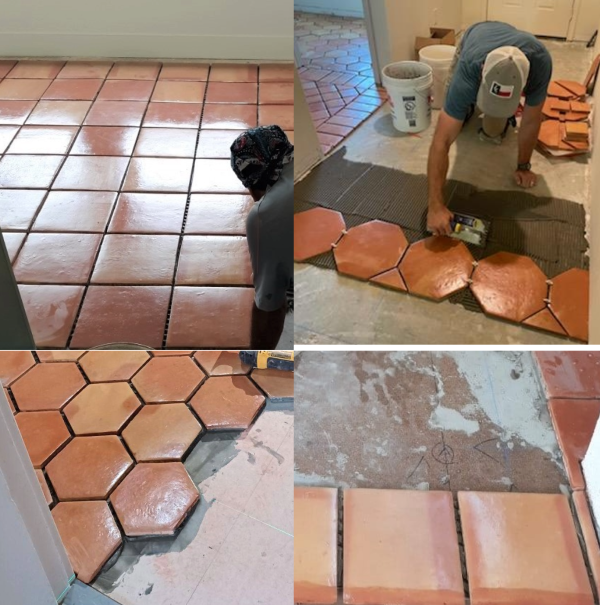
Properly installing sealed Saltillo tile involves several steps to ensure durability and a beautiful finish. Here’s a detailed guide:
Materials and Tools Needed:
- Sealed Saltillo tiles
- Thin-set mortar
- Saltillo Grout
- ½”- ¾” Notched Trowel
- wet saw
- Grout float
- Sponge
- Bucket
- Chalk line
- Tape measure
- Level
- Rubber mallet
- Toro Shield Waterbase Saltillo Sealer
Steps for Installation:
- Preparation:
- Clean the Subfloor: Ensure the subfloor is clean, dry, and level. Remove any debris, old adhesive, or contaminants.
- Plan the Layout: Measure the area and mark the center point. Use a chalk line to create a grid large enough to fit 4 tiles plus a ½” joint throughout the entire floor, which will help in aligning the tiles properly.
- Mixing the Mortar:
- Follow the manufacturer’s instructions to mix the thin-set mortar. It should have a creamy, peanut butter-like consistency.
- Applying the Mortar:
- Spread the mortar on the subfloor using a ½” – ¾”notched trowel. Work in small sections to prevent the mortar from drying out before you place the tiles.
- Use the flat side of the trowel to apply a thin layer of mortar behind the tile and then the notched side to spread on the floor. The larger the tile the larger the notched trowel should be.
- Laying the Tiles:
- Start from the center grid and place the first 4 tiles adjusting for the size differences without passing the marked lines. Press it firmly into the mortar and give it a slight twist to ensure proper adhesion.
- Spacers cannot be used in installing Saltillo tile
- Continue placing tiles, working outwards towards the edges of the room. Check frequently with a level to ensure the tiles are even as even as possible.
- Use a wet saw to cut tiles as needed for edges and corners.
-DO NOT PRESOAK SALTILLO TILES
- Grouting:
- Allow the tiles to set in the mortar for at least 24 hours before grouting
- Mix the grout according to the manufacturer’s instructions.
- Apply the grout using a grout float, working it into the gaps between the tiles. Hold the float at a 45-degree angle and spread the grout diagonally across the tiles to avoid dislodging them.
- Let the grout set for about 10-15 minutes, then use a damp sponge to wipe away excess grout from the surface of the tiles. Rinse the sponge frequently.
- Allow the grout to set for 24 hours and thoroughly clean the surface of the tile with a grout haze remover. Follow the manufacturer’s instructions on how to remove any grout haze.
- Final Sealing:
- Wait 36 hours after cleaning grout haze. Make sure the floor is dry and free from any debris. Pour Toro Shield into a bucket. Lightly dampen a sponge mop with the sealer without ringing it. Evenly apply the sealer over tile and grout. Allow the product to dry for a few hours and then repeat the process. This step helps protect the grout and enhance the tile’s durability.

